Transportation

GOM’s mobile optical metrology systems are used to control quality in train wagon building, reduce ship downtime during maintenance and repairs, and to improve driver comfort in utility vehicles by locating sources of unwanted vibrations.
Railway Engineering
Train Building Body-in-White
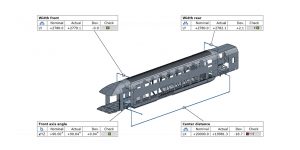
Manufacturers of modern rail vehicles need to guarantee sustainable mobility over the entire lifetime of their railroad cars. Today’s coaches combine attractive design with technical innovation, and deliver optimal operational performance coupled with maximum reliability, availability, maintainability, safety, environmental protection and cost-efficiency. GOM’s portable metrology systems support production controls and inspection of repairs and maintenance performed on railroad car bodies. They analyze inspection criteria that include body-in-white leveling to ground and wheel set, wall perpendicularity, and dimensions and distortions for door and window openings. Typically, one person can inspect a rail coach with TRITOP and provide a complete inspection report in less than 2.5 hours.
Shipbuilding
Reverse Engineering for Repair and Overhauls

Today an intelligent combination of knowledge, experience and craftsmanship is required to make ship construction and maintenance successful, safe and financially viable. Precision and cost-efficiency in the shipbuilding industry can be enhanced with high-end CAD programs and optical measurement systems. GOM’s TRITOP digital measurement system supports the rapid manufacturing of spare parts with modern CAD/CAM systems and CNC machines, reducing the time ships spend in dry dock from months to just days. Optical 3D metrology from GOM is used to improve the efficiency and precision of repair and reconstruction work in this sector.
Utility Vehicles
Shape and Dimension Control
GOM’s portable TRITOP system supports 3D coordinate measuring on objects of almost any size. It is ideally suited to verify the geometry and dimensions of machinery and utility vehicles. Measured 3D coordinates can be aligned with a CAD model to reveal any deviations from the design and to identify problems such as warp and bending. The fast and flexible measuring system can be operated by a single person and allows on-site verification of shapes and dimensions, without having to move vehicles into a garage. As the results are stored digitally, distances, angles, GD & T, etc., can always be subjected to further analysis at a later stage.
Vibration Analysis
GOM’s ARAMIS deformation measurement system analyzes the behavior of vehicles in operation to detect sources of unwanted vibrations. Vehicles can be observed in real time under different conditions, under varying mechanical loads, temperatures or speeds. The system supports online analysis of deformation, displacement, acceleration, speed and trajectories, replacing conventional extensometers and acceleration sensors. ARAMIS is the system of choice for root cause analysis of vibrations to optimize passenger comfort and safety.


