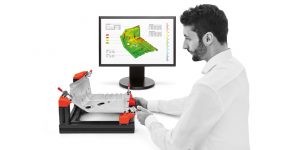
With the use of ATOS ScanBox, automotive supplier Allgaier has managed to reduce measuring times in toolmaking, production, and assembly by up to 50 percent.
Read PDF

Automobile supplier Metalsa achieves higher throughput by saving 2/3 of measuring time with the use of an optical 3D coordinate machine.
Read PDF

Progress-Werk Oberkirch (PWO) relies on optical 3D metrology from GOM in its tool shop. As a result, the company is able to reduce tool startup times and increase productivity.
Read PDF

The automotive supplier uses the ATOS Triple Scan system for process-encompassing and automated quality management.
Read PDF

The European group of companies optimizes its production processes using the ATOS Triple Scan system and benefits from competitive advantages due to shortened development times.
Read PDF

GEDIA’s new approach to quality control: The company is replacing tactile systems with full-surface optical 3D coordinate measurement. The new technology is also used for automated quality control.
Read PDF

GOM Inspect is independent of the scanning process. That is all-important for Vald. Birn. The company uses the software for quality control of its foundry production samples.
Read PDF

The healthcare company uses GOM Inspect as an advanced viewer program.
Read PDF

The specialist for industry switches, Kraus & Naimer uses GOM Inspect in development control and production for creating first inspection reports for go-ahead with the production.
Read PDF

The company BJB reduced the tool release process from three or four weeks to three or four days due to GOM Inspect Professional.
Read PDF

Groupwide roll-out of GOM Inspect for guaranteeing a smooth data exchange.
Read PDF

The press shop at BMW’s Dingolfing plant relies on optical metrology systems including automation and standardization for inspection of sheet metal components.
Read PDF

Dynamic 3D analysis of machine tools analyzes machine capability and extends tool life.
Read PDF

Improved determination of yield stress for sheet metal materials.
Read PDF

Knowledge of precise material quality helps R&D departments achieve shorter development times and fewer try-out iterations, at the same time guaranteeing product safety.
Read PDF

GOM’s ARGUS system speeds up optimization of the forming process while checking part safety at the same time.
Read PDF

Salzgitter AG measures and visualizes the quality and status of the stamping process on sheet metal with the ARGUS system.
Read PDF

ARAMIS detects flow behaviour of sheet metal material in high speed tensile test.
Read PDF

Choosing the right material achieves shorter development times and fewer try-out iterations and, at the same time, guarantees product safety.
Read more


